Category: Guides

  • How Much Contingency Should a Contractor Include in an Estimate?

    Even a carefully prepared contractor estimate can be affected by uncertain quantities, hidden conditions, price changes, weather delays or other project-specific risks. If no allowance is included, these costs may reduce or eliminate the expected profit.

    A contingency is an amount included in the internal project budget to cover identified uncertainties that cannot yet be calculated precisely. It is not a substitute for accurate estimating, and it should not be confused with overhead or profit.

    This guide explains how small contractors can identify project risks, calculate a reasonable contingency allowance and manage it throughout the project.

    Understand What Contingency Covers

    Contingency is a planned allowance for uncertainty within the defined project scope. It may cover risks that are known to exist but whose exact cost or effect cannot be determined when the estimate is prepared.

    Examples may include:

    • Minor quantity variations
    • Limited access or difficult working conditions
    • Concealed conditions that are reasonably foreseeable
    • Small material-price fluctuations
    • Weather-related disruption
    • Productivity uncertainty
    • Minor rework risk
    • Coordination problems
    • Uncertain disposal quantities
    • Other project-specific risks identified during estimating

    Contingency should not be used to hide missing scope, careless measurements or unsupported pricing. Major unknown work should be clarified, excluded, priced as an allowance or handled through a change-order procedure.

    Do Not Confuse Contingency With Overhead or Profit

    Contingency, overhead and profit serve different purposes.

    • Contingency covers defined project uncertainty.
    • Overhead recovers the business expenses required to operate but not assigned directly to one project.
    • Profit is the return remaining after project costs and overhead have been covered.

    A contractor should not expect the profit allowance to absorb every unexpected project cost. If contingency is omitted, ordinary uncertainty can consume the expected profit.

    Keep these amounts separate in the internal calculation so that the project budget and pricing decision remain clear.

    Assess the Project Risks Before Choosing an Amount

    Do not apply the same contingency percentage automatically to every project. Review the specific risks before deciding the amount.

    Consider:

    • Completeness of drawings and specifications
    • Accuracy of measured quantities
    • Age and condition of the property
    • Visibility of existing conditions
    • Complexity of the work
    • Material-price volatility
    • Availability of labor and materials
    • Site access and storage limitations
    • Weather exposure
    • Schedule pressure
    • Dependence on other trades
    • Client decision deadlines
    • Permit and inspection uncertainty
    • Reliability of subcontractor quotations
    • Experience with similar projects

    A well-defined, familiar project may require a smaller allowance than renovation work involving concealed conditions, incomplete information or a compressed schedule.

    Record the identified risks and the reason for the selected contingency. This creates a more defensible estimate than choosing a percentage without explanation.

    Calculate a Percentage-Based Contingency

    A simple method is to apply a selected percentage to an appropriate project-cost base.

    Use:

    Contingency amount = Selected cost base × Contingency percentage

    For example:

    • Estimated direct project cost: $50,000
    • Selected contingency percentage: 7%
    • Contingency amount: $50,000 × 7% = $3,500
    • Revised project-cost budget: $53,500

    Clearly define the cost base. A contractor may apply the percentage to total direct costs or only to the cost categories exposed to uncertainty. Use the same method consistently and avoid applying contingency twice.

    There is no single percentage suitable for every contractor or project. The selected rate should reflect the identified risks, available information, contract terms and the contractor’s experience with similar work.

    Use a Risk-Based Contingency When Possible

    A risk-based method estimates the possible cost of each significant uncertainty instead of applying one percentage to the entire project.

    For each risk, consider:

    • The possible additional cost
    • The likelihood of occurrence
    • Whether the risk can be avoided or reduced
    • Whether it is already included elsewhere
    • Who is responsible under the contract

    A simple expected-cost calculation is:

    Risk allowance = Possible cost × Estimated probability

    For example:

    • Possible additional disposal cost: $4,000
    • Estimated probability: 40%
    • Risk allowance: $4,000 × 40% = $1,600

    Repeat the calculation for the major identified risks and combine the allowances. The result is not a guarantee of the final cost, but it connects the contingency to documented project conditions.

    Probability estimates require judgment. Use historical records and experience with similar projects whenever available.

    Distinguish Allowances From Contingency

    An allowance is normally a placeholder for a known item whose exact selection, quantity or price has not yet been confirmed. Contingency covers uncertainty that may or may not result in additional cost.

    For example:

    • An allowance may be included for flooring that the client has not yet selected.
    • A contingency may cover the risk of additional floor preparation after the existing finish is removed.

    State allowances clearly in the client estimate, including what they cover and how differences will be handled.

    Do not include the same uncertainty in both an allowance and the contingency. Review the estimate for duplication before calculating the selling price.

    Decide How Contingency Will Be Presented

    A contingency may be included within the contractor’s internal cost and selling-price calculation, or it may be shown separately when the contract and pricing method require transparency.

    The appropriate treatment depends on:

    • The type of contract
    • Client requirements
    • Applicable laws and regulations
    • Whether unused amounts remain with the contractor or are credited to the client
    • Approval requirements for using the allowance
    • Documentation and reporting obligations

    Do not describe contingency as a client-controlled allowance unless the contract treats it that way. Similarly, do not assume that every unused contingency amount automatically becomes profit.

    State the commercial terms clearly and obtain appropriate legal or accounting advice when the treatment is uncertain.

    Do Not Use Contingency for Scope Changes

    Contingency is not a replacement for a properly documented change order. If the client changes the scope or genuinely additional work becomes necessary, follow the contract’s change-order procedure.

    Examples may include:

    • Client-requested upgrades
    • Additional rooms or quantities
    • Design changes
    • Work excluded from the original estimate
    • New requirements imposed after contract approval
    • Concealed conditions treated as extra work under the contract

    Using contingency for additional scope without documenting the change can reduce the remaining protection for the original project risks.

    For guidance on calculating and approving additional work, read How to Price Contractor Change Orders Without Losing Profit.

    Track Contingency During the Project

    Record the original contingency separately in the internal project budget. When part of it is used, document the amount, date, reason and supporting cost.

    Track:

    • Original contingency
    • Approved contingency use
    • Remaining contingency
    • Actual project cost to date
    • Estimated cost remaining
    • Forecast final cost
    • Forecast final profit
    • Forecast gross margin

    Do not reduce the remaining contingency simply because the project is progressing. Review whether the related risks have actually passed.

    If a risk no longer exists, the unused allowance may improve the forecast. If new information increases the expected cost, update the forecast promptly rather than waiting until the project is complete.

    Avoid Common Contingency Mistakes

    Common mistakes include:

    • Applying the same percentage to every project
    • Choosing an amount without identifying the risks
    • Using contingency to cover incomplete estimating
    • Treating contingency as profit
    • Using profit to absorb ordinary project uncertainty
    • Including the same risk in both an allowance and contingency
    • Using contingency for client-requested scope changes
    • Failing to define who controls the contingency
    • Spending it without documentation
    • Ignoring the remaining balance when forecasting profit
    • Failing to update assumptions using completed-project data

    A larger contingency cannot correct an unclear scope or poorly prepared estimate. Improve the underlying quantities, rates, exclusions and contract terms first, then add an appropriate allowance for the uncertainty that remains.

    Use a Connected Cost and Profit Workflow

    Contingency should remain connected to the internal project budget, selling price and actual-cost forecast.

    The AZELIVO Contractor Bid-to-Profit Toolkit provides four connected Excel tools:

    • Job Cost Calculator
    • Pricing Calculator
    • Estimate Builder
    • Profit Tracker

    This workflow helps small contractors include contingency in the project cost, calculate a selling price, prepare the client estimate and track how project uncertainty affects the forecast final profit.

    Conclusion

    A reasonable contingency protects the project budget from identified uncertainty without replacing careful estimating or clear contract terms.

    Assess the risks specific to the project, choose an appropriate calculation method and keep contingency separate from overhead, profit and client allowances. Use change orders for additional scope rather than consuming the original risk allowance.

    Finally, document every use of contingency and update the forecast throughout the project. Historical results from completed work will help improve future contingency decisions.
  • How to Calculate Labor Cost for a Contractor Estimate

    Labor cost is more than an employee’s hourly wage. A contractor may also pay employer taxes, workers’ compensation, benefits, paid nonproductive time and other employment-related expenses.

    An estimate that includes only wage rates can understate the true project cost and reduce the expected profit. The calculation must also account for the number of productive hours required to complete the work.

    This guide explains how small contractors can estimate labor hours, calculate a burdened labor rate and include labor cost correctly in a project estimate.

    Distinguish Wage Rate From Labor Cost

    The wage rate is the amount paid directly to the employee for each hour worked. The contractor’s actual labor cost may be higher because the business is responsible for additional employment expenses.

    These may include:

    • Employer payroll taxes
    • Workers’ compensation insurance
    • Unemployment insurance
    • Health or retirement benefits
    • Paid vacation, holidays and sick leave
    • Bonuses and allowances
    • Training and certification
    • Other legally required or company-provided benefits

    The combined cost is often called the burdened labor rate or fully loaded labor rate.

    Requirements differ by location and employment arrangement. Use current payroll, insurance and benefit information rather than a general percentage copied from another contractor.

    Calculate the Labor Burden

    First, identify the annual or hourly employment costs paid in addition to wages.

    Use:

    Labor burden percentage = Additional employment costs ÷ Base wages × 100

    For example:

    • Annual base wages: $50,000
    • Employer taxes, insurance and benefits: $15,000
    • Labor burden percentage: $15,000 ÷ $50,000 × 100 = 30%

    The burdened hourly rate can then be calculated as:

    Burdened hourly rate = Hourly wage × (1 + Labor burden percentage)

    If the hourly wage is $25 and the burden is 30%:

    $25 × 1.30 = $32.50 per hour

    Keep the supporting calculation and update it when wages, tax rates, insurance premiums or benefits change.

    Account for Productive and Nonproductive Time

    Employees are paid for more hours than can always be charged directly to a project. Travel, meetings, training, equipment preparation, shop work, paid leave and downtime may reduce the number of productive project hours.

    When calculating an internal hourly labor cost, consider:

    Cost per productive hour = Total annual employee cost ÷ Annual productive hours

    For example:

    • Total annual employee cost: $65,000
    • Productive project hours: 1,600
    • Cost per productive hour: $65,000 ÷ 1,600 = $40.63

    Dividing by 2,080 paid hours instead would produce $31.25 and could understate the cost of each productive hour.

    Use realistic historical information when estimating productive hours. Do not assume that every paid hour can be assigned to client work.

    Estimate the Labor Hours Required

    Divide the scope into measurable activities and estimate the crew hours required for each one.

    Consider:

    • Quantity of work
    • Crew size
    • Expected production rate
    • Worker skill and experience
    • Site access
    • Existing conditions
    • Setup and cleanup
    • Material handling
    • Coordination with other trades
    • Inspection requirements
    • Weather exposure
    • Rework risk

    Use:

    Labor hours = Number of workers × Hours worked per worker

    For example, a three-person crew working for four eight-hour days requires:

    3 × 4 × 8 = 96 labor hours

    Do not confuse labor hours with project duration. The example represents four working days but 96 labor hours.

    Use Different Rates for Different Workers

    A crew may include workers with different wages, burdens and productivity levels. Calculate each labor category separately when the difference is significant.

    For example:

    • Lead worker: 24 hours × $45 = $1,080
    • Skilled worker: 48 hours × $38 = $1,824
    • Helper: 48 hours × $26 = $1,248
    • Total estimated labor cost: $4,152

    Using one average crew rate can be practical, but the average must reflect the crew that will actually perform the work.

    Review the planned crew composition. Assigning highly paid skilled workers to tasks that could be completed efficiently by trained helpers may increase the cost without improving the result.

    Include Overtime and Premium Pay

    If the schedule requires overtime, night work, weekends or other premium hours, calculate the additional cost correctly.

    Consider:

    • Overtime wage multiplier
    • Payroll taxes affected by higher wages
    • Shift differentials
    • Additional supervision
    • Reduced productivity during extended hours
    • Transportation or meal allowances
    • Local labor-law requirements

    Do not apply the normal hourly cost to premium hours without checking how wages and related expenses change.

    Accelerated work can require more workers or longer shifts while producing less output per hour. Include the expected productivity effect as well as the higher wage rate.

    Include the Owner’s Project Labor

    An owner-operator’s project labor is a real cost even when the owner does not receive an hourly paycheck for every hour worked.

    Include time spent on:

    • Physical project work
    • Site supervision
    • Material procurement
    • Project-specific meetings
    • Measurements and layout
    • Coordination with subcontractors
    • Inspections and client handover
    • Project-specific administration

    Use a reasonable internal labor rate for project work. Do not treat the owner’s time as free and then assume the remaining amount is profit.

    General business management may belong in overhead, while time directly connected to a specific project may be included in job cost. Apply the chosen method consistently.

    Separate Employee Labor From Subcontractor Cost

    Subcontractor quotations should normally be recorded in the subcontractor cost category rather than combined with employee labor.

    A subcontractor price may include:

    • Their labor
    • Materials
    • Equipment
    • Overhead
    • Profit
    • Taxes or fees

    Confirm exactly what the quotation includes and excludes. The contractor may still need to provide supervision, access, protection, cleanup, permits or materials.

    Worker classification is governed by applicable law and cannot be determined only by calling someone a subcontractor. Contractors should obtain appropriate professional advice when classification requirements are uncertain.

    Calculate the Total Estimated Labor Cost

    Calculate the estimated labor cost for each worker or labor category and then combine the results.

    Use:

    Estimated labor cost = Estimated labor hours × Burdened hourly rate

    For example:

    • Estimated labor hours: 120
    • Burdened hourly rate: $38
    • Estimated labor cost: 120 × $38 = $4,560

    Add any separately calculated overtime, owner project labor or other labor-related cost that is not already included.

    This amount is an internal project cost. It is not necessarily the labor amount displayed to the client, and it is not the final selling price. Overhead and profit must still be addressed through the contractor’s pricing method.

    Track Actual Labor Hours During the Project

    Record actual labor hours by employee, date, activity and project. Do not rely only on the total payroll amount.

    Compare:

    • Estimated hours
    • Actual hours used
    • Hours remaining
    • Estimated labor cost
    • Actual labor cost
    • Forecast final labor cost
    • Labor-cost variance

    If a task is consuming more hours than planned, investigate the reason while work is still underway.

    Possible causes include inaccurate quantities, difficult site conditions, low productivity, rework, waiting time, poor coordination or an unrecorded scope change. Early identification allows the contractor to adjust the plan and improve future estimates.

    Avoid Common Labor-Costing Mistakes

    Common mistakes include:

    • Using wage rate as the complete labor cost
    • Ignoring employer taxes, insurance and benefits
    • Dividing annual cost by paid hours instead of productive hours
    • Underestimating setup, cleanup and material-handling time
    • Confusing project duration with total labor hours
    • Applying one rate to every worker without review
    • Omitting the owner’s project labor
    • Treating subcontractor cost as employee payroll
    • Ignoring overtime and reduced productivity
    • Failing to compare estimated and actual hours

    Maintain written support for labor rates and production assumptions. Update them using information from completed projects rather than relying indefinitely on old estimates

    Include Labor in the Complete Job-Cost Estimate

    Labor is only one part of the project cost. Combine it with materials, subcontractors, equipment, permits, contingency and allocated overhead before calculating the selling price.

    For the complete costing structure, read Contractor Job Cost Estimate: What to Include Before Pricing a Project.

    Use a Connected Labor and Pricing Workflow

    Labor estimates should remain connected to the project budget, selling price and actual-cost record.

    The AZELIVO Contractor Bid-to-Profit Toolkit provides four connected Excel tools:

    • Job Cost Calculator
    • Pricing Calculator
    • Estimate Builder
    • Profit Tracker

    This workflow helps small contractors include labor in the internal job cost, calculate a selling price, prepare the client estimate and compare budgeted labor with actual project spending.

    Conclusion

    A contractor estimate should use the true cost of productive labor, not only the hourly wage. Employer-paid expenses, nonproductive time, overtime and owner labor can materially change the internal hourly cost.

    Estimate labor hours by activity and crew type, then multiply them by appropriate burdened rates. Keep employee labor, owner project labor and subcontractor costs properly classified.

    Finally, compare estimated and actual labor hours throughout the project. Accurate labor records improve current cost control and provide reliable production information for future estimates.

  • How to Price Contractor Change Orders Without Losing Profit

    A project change can add revenue without adding profit. Extra materials, disrupted labour, remobilisation, schedule extensions and administrative time are often overlooked when contractors price additional work.

    A change order should document the revised scope, price and schedule before the changed work begins. It should also be based on a complete internal cost calculation rather than a quick guess or an informal percentage.

    This guide explains how small contractors can identify change-order costs, calculate a suitable selling price, obtain written approval and protect the project’s expected profit.

    Understand What Requires a Change Order

    A change order records an agreed modification to the original contract. It may increase or decrease the price, change the scope, extend the schedule or revise another contractual requirement.

    Common reasons include:

    • Client-requested additions or substitutions
    • Unforeseen concealed conditions
    • Design or specification revisions
    • Code or inspection requirements
    • Material unavailability
    • Changes requested by an architect or engineer
    • Correction of inaccurate client information
    • Acceleration or after-hours work
    • Deletion of previously included work
    • Delays that create additional compensable cost

    Not every site instruction automatically entitles the contractor to additional payment. Review the original scope, exclusions and contract procedure before treating work as a change.

    Document the reason for the change and identify who has authority to approve it.

    Define the Changed Scope Before Pricing

    Describe exactly what will be added, removed or modified. A clear scope prevents the change order from creating another disagreement later.

    Include:

    • Location of the changed work
    • Quantities and dimensions
    • Materials, products and finishes
    • Labour activities
    • Demolition, preparation and disposal
    • Subcontracted work
    • Permits, testing or inspections
    • Client-supplied items
    • Exclusions and assumptions
    • Required drawings or specifications

    Compare the change with the original contract and identify any work that has already been priced. Charge only for the net effect of the modification.

    If important information is unavailable, state the assumptions used or provide an allowance subject to later adjustment. Do not present an uncertain scope as a fixed and complete price.

    Calculate the Direct Cost of the Change

    Estimate every direct cost required to complete the changed work.

    Include:

    • Materials and delivery
    • Direct labour hours
    • Payroll burden where applicable
    • Subcontractor quotations
    • Equipment and tool rental
    • Demolition and disposal
    • Permits, testing and inspections
    • Protection and cleanup
    • Travel or mobilisation
    • Other project-specific expenses

    Use current supplier prices and labour rates rather than the rates used when the original project was estimated. A change may occur months later, after costs have increased.

    For deleted work, calculate the cost genuinely avoided. Do not credit the full original selling price automatically if some labour, materials, ordering or administrative cost has already been incurred.

    Include Disruption and Additional Project Costs

    The visible work may represent only part of the change-order cost. A modification can also disrupt work that was already planned or completed.

    Consider:

    • Work stoppage and restart time
    • Remobilisation
    • Reordering or returning materials
    • Restocking and cancellation charges
    • Rework of completed construction
    • Additional supervision
    • Coordination with subcontractors
    • Revised drawings or measurements
    • Schedule extension
    • Extra site facilities or equipment
    • Administrative and documentation time

    Include only costs that are reasonably connected to the change and permitted by the contract.

    Document how the change affects productivity or sequencing. A short task performed out of sequence may cost more than the same task included in the original workflow.

    Recover Overhead on the Changed Work

    Additional work uses business resources even when those resources are not listed as direct project expenses. The change-order price should therefore account for an appropriate share of overhead.

    Overhead may include:

    • Office administration
    • Estimating and accounting
    • Business insurance
    • Software and communication
    • Vehicles and facilities
    • Management time
    • Licensing and professional fees
    • General tools and support costs

    Use the same consistent overhead-recovery method applied to the original project unless the contract specifies a different method for changes.

    Do not assume that adding profit alone will recover overhead. Overhead is a business cost, while profit is the return remaining after all costs have been covered.

    Allow for Risk and Uncertainty

    Changes are often priced quickly and may involve incomplete information. Include a reasonable allowance for identifiable uncertainty rather than ignoring the risk.

    Consider:

    • Hidden conditions
    • Unconfirmed quantities
    • Supplier lead times
    • Limited site access
    • Compatibility with existing work
    • Overtime or accelerated completion
    • Inspection requirements
    • Additional damage discovered during removal
    • Coordination with other contractors

    The allowance should reflect the actual risk and should not be used as a substitute for defining the scope.

    Where uncertainty is substantial, consider an allowance, unit-rate or time-and-material arrangement if the contract and client permit it. State how the final amount will be calculated and documented.

    Calculate the Change-Order Selling Price

    After calculating direct cost, disruption cost, overhead and risk allowance, determine the selling price using the business’s chosen pricing method.

    If pricing from a target profit margin, use:

    Selling price = Total change-order cost ÷ (1 − Target margin)

    For example:

    • Total change-order cost: $4,000
    • Target margin: 25%
    • Selling price: $4,000 ÷ 0.75 = $5,333.33

    The forecast gross profit is:

    $5,333.33 − $4,000 = $1,333.33

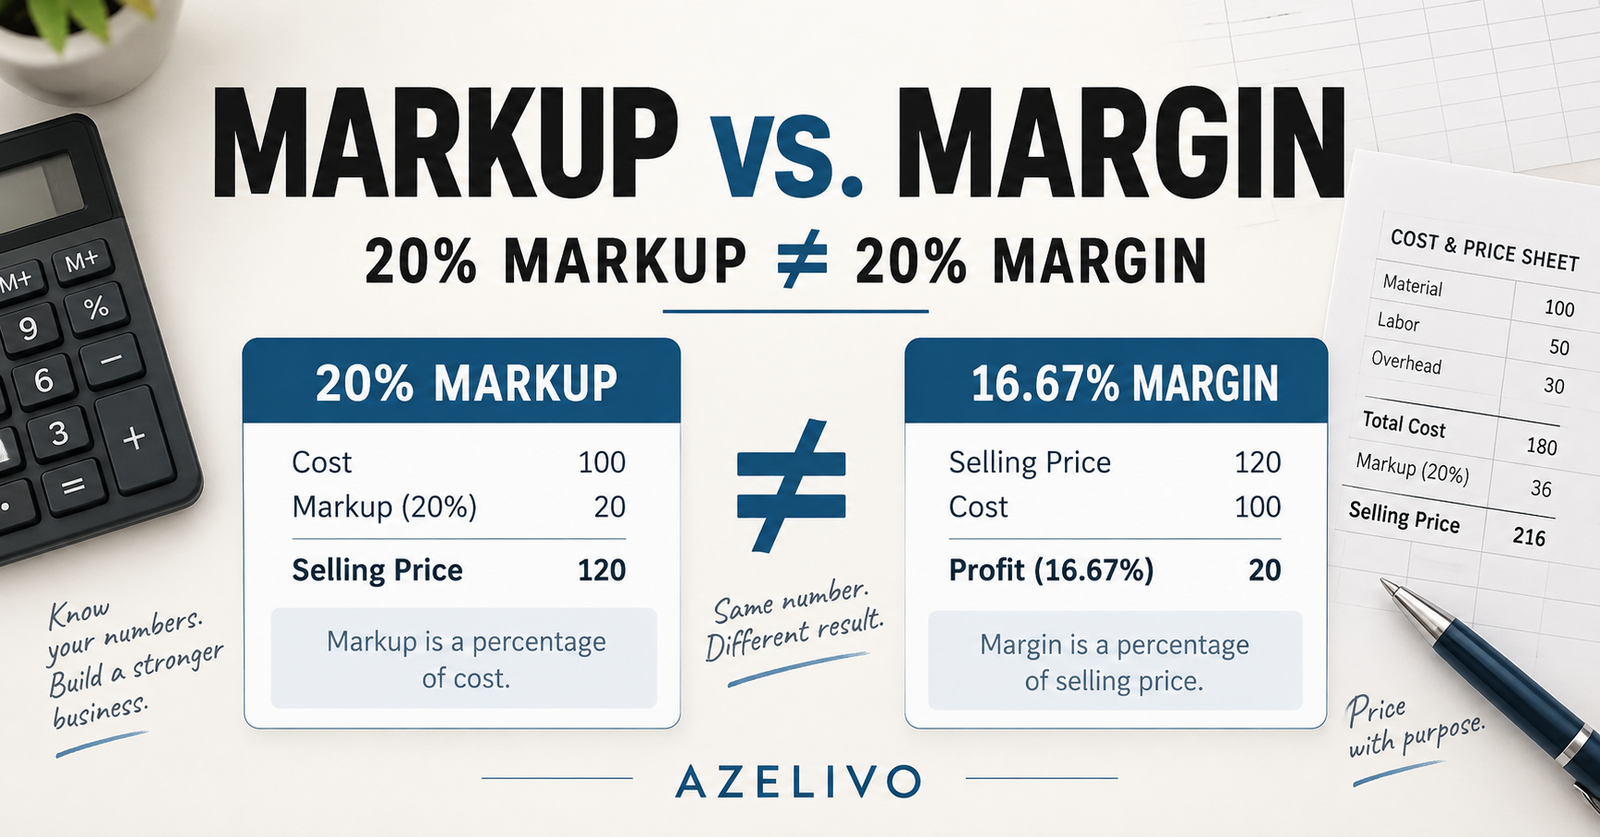
    A 25% markup would produce a price of only $5,000 and a gross margin of 20%. Confirm whether the business is applying markup or target margin before approving the price.

    Price the Schedule Impact

    A change may affect the project timeline even when the physical work appears limited.

    Evaluate whether it will:

    • Extend the completion date
    • Delay following activities
    • Require resequencing
    • Create idle labour or equipment time
    • Require overtime or additional shifts
    • Delay subcontractors
    • Increase supervision or site-running costs
    • Affect material delivery dates
    • Require remobilisation

    State the number of additional days or revised milestone dates when they can be reasonably determined.

    If the schedule effect cannot yet be calculated, reserve the right to revise the time and related cost after the necessary information becomes available, subject to the contract and applicable law.

    Set the Change-Order Payment Terms

    State when the change-order amount will be invoiced and paid. Do not assume that the original payment schedule automatically covers additional work.

    Depending on the change and applicable law, payment may be required:

    • With written approval
    • Before ordering special materials
    • When changed work begins
    • At a defined progress milestone
    • Upon completion of the changed work
    • Through revised remaining progress payments

    Large or material-intensive changes may require more than one payment stage.

    Update the total contract value and payment schedule so the client can see the revised financial position. Avoid postponing all change-order payment until the final invoice unless the business can safely finance the additional cost.

    Obtain Written Approval Before Starting

    The change order should be approved by authorised representatives of both parties before the changed work begins.

    Include:

    • Change-order number and date
    • Original contract reference
    • Description of the change
    • Increase or decrease in price
    • Revised contract value
    • Payment terms
    • Schedule impact
    • Assumptions and exclusions
    • Referenced attachments
    • Client and contractor approval

    Verbal approval can be difficult to prove and may leave the contractor responsible for costs the client later disputes.

    Emergency conditions may require immediate protective work. Follow the emergency and notice provisions in the contract, document the circumstances and obtain written confirmation as soon as reasonably possible.

    Track the Change Order Separately

    After approval, add the change to the project budget and financial records without losing the original contract information.

    Track:

    • Approved change-order revenue
    • Budgeted change-order cost
    • Actual material cost
    • Actual labour cost
    • Subcontractor and equipment cost
    • Amount invoiced
    • Amount collected
    • Remaining cost
    • Forecast profit on the change
    • Revised total project profit

    Separate tracking shows whether the additional work was priced correctly. A profitable original contract can lose margin when several poorly priced changes are combined with it.

    Update the project’s forecast final cost, profit and gross margin whenever a significant change is approved.

    Avoid Common Change-Order Pricing Mistakes

    Common mistakes include:

    • Starting changed work without written approval
    • Pricing only materials and direct labour
    • Ignoring disruption and remobilisation
    • Using outdated supplier or labour rates
    • Forgetting overhead recovery
    • Applying markup when a target margin was intended
    • Crediting deleted work at the full original selling price
    • Failing to revise the schedule
    • Delaying payment until final completion
    • Combining unapproved requests with approved revenue
    • Failing to track actual change-order costs

    Use a consistent review process before every change order is issued. Small omissions repeated across several changes can remove a significant portion of the project’s expected profit.

    Check the Effect on Total Project Profit

    A change order should be evaluated both as separate work and as part of the complete project.

    After approval, update:

    • Total contract value
    • Total project budget
    • Actual cost to date
    • Estimated cost remaining
    • Forecast final cost
    • Forecast final profit
    • Forecast gross margin
    • Billing and cash received

    A profitable change may improve the project margin, while an underpriced or disruptive change can reduce it.

    For guidance on updating the forecast, read How to Track Actual Job Costs and Forecast Contractor Profit.

    Use a Connected Change-Order Workflow

    Change-order pricing is more reliable when it uses the same cost categories, overhead method and margin calculation as the original project estimate.

    The AZELIVO Contractor Bid-to-Profit Toolkit provides four connected Excel tools:

    • Job Cost Calculator
    • Pricing Calculator
    • Estimate Builder
    • Profit Tracker

    This workflow helps small contractors calculate the cost and selling price of changed work, update the client estimate and payment schedule and monitor the effect on forecast final profit.

    Conclusion

    A contractor change order should cover the complete financial and operational effect of changed work. Materials and labour are important, but disruption, overhead, risk, payment timing and schedule impact may also affect the true cost.

    Define the scope carefully, calculate the internal cost and apply the intended pricing method before presenting the change to the client. Obtain written approval before starting whenever possible.

    Finally, track every approved change separately and update the project forecast. Consistent change-order management protects profit and reduces disputes over scope, price and completion dates.

  • How to Track Actual Job Costs and Forecast Contractor Profit

    A contractor cannot determine whether a project is profitable by looking only at the selling price or the amount of cash received. Profit depends on the final contract value and the complete cost of delivering the work.

    Actual costs often differ from the original estimate because of price changes, wasted materials, additional labour, subcontractor variations, delays and unexpected site conditions. If these differences are recorded only after completion, the contractor loses the opportunity to correct the project while work is still underway.

    This guide explains how small contractors can compare budgeted and actual job costs, estimate the cost remaining to complete the work and forecast the project’s final profit and gross margin.

    Begin With the Approved Project Budget

    The original job-cost estimate becomes the project budget after the price and scope are approved. It provides the baseline against which actual performance can be measured.

    The budget should separate:

    • Materials
    • Direct labour
    • Subcontractors
    • Equipment and rentals
    • Permits and project-specific fees
    • Other direct project costs
    • Contingency
    • Allocated overhead

    Do not use only one combined cost figure. Separate categories make it easier to identify where overruns or savings are occurring.

    Record the approved selling price and expected gross profit alongside the budget. If the client approves a change order, update the contract value and the affected budget categories while preserving a record of the original amounts.

    Record Actual Costs Consistently

    Enter project costs regularly rather than waiting until the work is completed. Weekly updating is suitable for many small projects, while fast-moving projects may require more frequent review.

    Record:

    • Supplier invoices and receipts
    • Labour hours and labour cost
    • Subcontractor invoices
    • Equipment and rental charges
    • Permit and inspection fees
    • Delivery, disposal and transportation costs
    • Approved project-specific purchases
    • Credits, returns and supplier refunds

    Assign every transaction to the correct project and cost category. A business expense that cannot be connected to a specific job may belong in overhead rather than direct project cost.

    Use invoice numbers, dates and short descriptions so each entry can be verified later. Consistent records reduce omissions and make the final project review more reliable.

    Track Committed Costs as Well as Paid Costs

    Paid invoices do not show the full financial position of a project. The contractor may already be committed to costs that have not yet been invoiced or paid.

    Committed costs may include:

    • Approved purchase orders
    • Materials ordered but not yet delivered
    • Signed subcontract agreements
    • Equipment reserved for future use
    • Approved supplier quotations
    • Accrued labour not yet processed through payroll
    • Work completed by subcontractors but not yet billed

    Record these commitments separately from actual paid costs. Otherwise, the project may appear to have more available budget than it really does.

    When a committed amount becomes an actual invoice, replace the commitment with the final recorded cost to avoid counting it twice.

    Compare Budget With Actual Cost

    Paid invoices do not show the full financial position of a project. The contractor may already be committed to costs that have not yet been invoiced or paid.

    Committed costs may include:

    • Approved purchase orders
    • Materials ordered but not yet delivered
    • Signed subcontract agreements
    • Equipment reserved for future use
    • Approved supplier quotations
    • Accrued labour not yet processed through payroll
    • Work completed by subcontractors but not yet billed

    Record these commitments separately from actual paid costs. Otherwise, the project may appear to have more available budget than it really does.

    When a committed amount becomes an actual invoice, replace the commitment with the final recorded cost to avoid counting it twice.

    Estimate the Cost Remaining to Complete the Project

    The cost remaining is the amount the contractor expects to spend from the review date until the project is complete.

    Estimate it by reviewing:

    • Materials still required
    • Labour hours remaining
    • Unfinished subcontractor work
    • Equipment still needed
    • Outstanding permits or inspections
    • Expected cleanup and closeout costs
    • Known corrective work
    • Remaining contingency requirements

    Do not calculate the remaining cost automatically by subtracting actual cost from the original budget. If productivity is lower than expected or prices have changed, the remaining work may cost more than the unused budget.

    Update the estimate using current information from the site, suppliers, employees and subcontractors. A realistic remaining-cost forecast is essential for predicting final profit.

    Forecast the Final Project Cost

    Forecast final cost by combining the cost already incurred with the amount expected to complete the remaining work.

    Use:

    Forecast final cost = Actual cost to date + Estimated cost remaining

    For example:

    • Actual cost to date: $24,000
    • Estimated cost remaining: $18,000
    • Forecast final cost: $42,000

    Compare this forecast with the original budget. If the approved project budget was $40,000, the current forecast indicates a potential $2,000 cost overrun.

    Update the forecast whenever new information becomes available. It should represent the contractor’s best current estimate, not the amount the contractor hopes to spend.

    Calculate Forecast Final Profit and Gross Margin

    First, determine the current approved contract value, including signed change orders.

    Use:

    Forecast final profit = Approved contract value − Forecast final cost

    Then calculate:

    Forecast gross margin = Forecast final profit ÷ Approved contract value × 100

    For example:

    • Original contract value: $60,000
    • Approved change orders: $5,000
    • Current approved contract value: $65,000
    • Forecast final cost: $42,000
    • Forecast final profit: $23,000
    • Forecast gross margin: 35.4%

    Use the approved value rather than unapproved client requests or potential future work. Revenue should not be increased until the change has been properly authorised.

    The forecast margin can be compared with the target margin used when pricing the project. A declining margin is an early warning that costs, scope or productivity require attention.

    Do Not Confuse Profit With Cash Flow

    A project can show a forecast profit while still creating a cash shortage. Profit measures the difference between revenue and cost, whereas cash flow reflects when money is received and paid.

    Track separately:

    • Total approved contract value
    • Amount invoiced
    • Amount collected
    • Outstanding client payments
    • Actual costs paid
    • Unpaid supplier and subcontractor obligations
    • Remaining expected costs
    • Available project cash

    For example, a project may be expected to earn a $20,000 profit but still have insufficient cash today if the client has not paid a progress invoice and supplier payments are due.

    Review the payment schedule together with the profit forecast. Strong pricing does not protect the business if collections occur too late to fund the work.

    Investigate the Cause of Cost Variances

    When a cost category exceeds its budget, identify the reason rather than recording only the amount.

    Possible causes include:

    • Missing quantities in the original estimate
    • Supplier price increases
    • Excess material waste
    • Incorrect labour-hour assumptions
    • Low productivity or rework
    • Unrecorded scope changes
    • Subcontractor variations
    • Equipment used longer than planned
    • Delays caused by access, inspections or other trades
    • Damage, theft or replacement purchases

    Separate controllable causes from events outside the contractor’s reasonable control. The appropriate response may involve improving supervision, changing purchasing decisions, obtaining a change order or revising the remaining-cost forecast.

    Record the reason for significant variances. This information becomes valuable when estimating similar projects in the future.

    Update Approved Change Orders Promptly

    Every approved change order can affect revenue, cost, billing and the completion schedule.

    For each change, record:

    • Approved increase or decrease in contract value
    • Additional materials
    • Additional labour hours
    • Subcontractor or equipment costs
    • Revised payment requirements
    • Effect on project duration
    • Amount invoiced and collected

    Do not increase forecast revenue for work that has not been approved. Unapproved additional work may create a cost without a legally enforceable right to payment.

    Keep original-contract performance visible separately from change-order performance when possible. This helps determine whether the base project was estimated correctly and whether the changes themselves were priced profitably.

    Review the Forecast Regularly

    Set a consistent review frequency based on the size, duration and pace of the project.

    A regular review may include:

    • Actual cost by category
    • Committed but uninvoiced cost
    • Estimated cost remaining
    • Forecast final cost
    • Approved contract value
    • Forecast final profit and margin
    • Amount invoiced and collected
    • Overdue client payments
    • Major risks and required action

    Weekly reviews are practical for many active small-contractor projects. Longer or slower projects may be reviewed at major milestones, but significant changes should be recorded immediately.

    Assign responsibility for updating the figures. A tracking system is unreliable when no one is accountable for collecting invoices, labour information, change orders and progress data.

    Respond When Forecast Profit Is Falling

    A declining forecast should lead to a specific response. Waiting until project completion confirms the loss but does not help prevent it.

    Possible actions include:

    • Correcting labour productivity problems
    • Reducing waste and unnecessary purchases
    • Renegotiating unresolved supplier or subcontractor issues
    • Obtaining written approval for additional scope
    • Revising the remaining work plan
    • Protecting unused contingency
    • Accelerating legitimate billing and collection
    • Escalating technical or scheduling risks
    • Improving supervision and documentation

    Do not reduce required quality, safety or contractual obligations merely to restore the forecast margin.

    Record the action taken and review whether it improves the next forecast. This creates an evidence-based management process instead of relying on intuition.

    Complete a Final Project Review

    After the project is financially complete, compare the final results with the original estimate and the latest forecast.

    Review:

    • Original and revised contract value
    • Budgeted and final cost by category
    • Final gross profit and margin
    • Material quantity and price differences
    • Estimated and actual labour hours
    • Subcontractor variations
    • Change-order profitability
    • Billing and collection delays
    • Contingency used
    • Main causes of overruns or savings

    Record lessons that can improve future estimates, supplier decisions, labour allowances, payment schedules and project controls.

    Historical project data is one of the most useful estimating resources available to a contractor. It replaces assumptions with evidence from completed work.

    Connect Job Costing With the Original Estimate

    Reliable tracking begins with a complete and well-organised project estimate. The original cost categories should remain consistent when actual expenses and remaining costs are recorded.

    For guidance on preparing the starting budget, read Contractor Job Cost Estimate: What to Include Before Pricing a Project.

    Use a Connected Cost and Profit-Tracking Workflow

    The project estimate, selling price, client estimate and actual-cost record should use consistent figures and categories. A connected workflow reduces repeated data entry and makes financial changes easier to identify.

    The AZELIVO Contractor Bid-to-Profit Toolkit provides four connected Excel tools:

    • Job Cost Calculator
    • Pricing Calculator
    • Estimate Builder
    • Profit Tracker

    The Profit Tracker compares budgeted and actual costs, records billing and cash received and helps forecast the final project profit and gross margin.

    Conclusion

    Contractor profit should be monitored throughout the project, not calculated only after the final invoice has been paid. Regular tracking shows whether actual and committed costs remain aligned with the approved budget.

    A reliable forecast combines actual cost to date with a realistic estimate of the cost remaining. Comparing the forecast final cost with the approved contract value reveals the expected final profit and gross margin.

    When the forecast changes, investigate the reason and act promptly. Consistent job-cost tracking protects profit, supports cash-flow decisions and provides better information for pricing future projects.

  • How to Create a Contractor Payment Schedule That Protects Cash Flow

    A profitable project can still create financial pressure when payments arrive later than labour, material and subcontractor costs become due. A well-planned contractor payment schedule helps keep cash moving through the project while giving the client clear, measurable payment expectations.

    The schedule should connect each payment to a defined event, such as contract acceptance, material procurement, completion of a project milestone or final handover. It should also comply with applicable state and local laws governing deposits, progress payments, retainage and payment notices.

    This guide explains how small contractors can create a practical payment schedule that supports project cash flow without collecting substantially more than the value of the work performed or materials supplied.

    Understand the Purpose of a Payment Schedule

    A payment schedule defines when the client must pay and what project event supports each payment. It converts the total contract price into manageable stages that correspond with the contractor’s expected costs and progress.

    A clear schedule helps the contractor:

    • Fund materials, labour and subcontractor payments
    • Reduce dependence on business credit
    • Identify overdue payments quickly
    • Plan purchasing and project activities
    • Maintain a record for billing and collection
    • Avoid completing too much work before receiving payment

    It also helps the client understand what is being paid for and when each amount will become due.

    The payment schedule is not a substitute for an accurate job-cost estimate. It should be prepared only after the contractor understands the project cost, selling price, expected duration and likely timing of major expense

    Start With the Project Cash-Flow Forecast

    Before setting payment percentages, estimate when money will leave the business during the project.

    List the expected timing of:

    • Deposits required by suppliers
    • Material purchases and deliveries
    • Weekly or biweekly payroll
    • Subcontractor deposits and progress invoices
    • Equipment rental charges
    • Permit and inspection fees
    • Insurance or bonding costs allocated to the project
    • Other major project expenses

    Compare these outgoing payments with the proposed client payments. The objective is to avoid a large gap in which the contractor must finance the client’s project from business reserves or borrowed funds.

    Include reasonable timing allowances. A client payment that becomes due on a milestone date may not be available immediately if the contract provides several days for invoicing and payment.

    Choose Measurable Payment Milestones

    Connect each progress payment to a milestone that both parties can identify. Avoid vague triggers such as “when sufficient work is completed.”

    Suitable milestones may include:

    • Contract acceptance and receipt of the permitted deposit
    • Delivery of specified major materials
    • Completion of demolition or site preparation
    • Completion of rough framing
    • Completion of rough plumbing, electrical or mechanical work
    • Required inspection approval
    • Installation of cabinets, fixtures or finishes
    • Substantial completion
    • Completion of agreed corrective items
    • Final handover

    Select milestones that match the actual sequence and cost pattern of the project. A milestone should represent meaningful progress, not an arbitrary date.

    Describe each milestone precisely in the estimate or contract. If a payment depends on several activities, state whether all of them must be completed before the invoice becomes due.

    Set the Deposit Carefully

    An initial deposit can confirm the client’s commitment and help cover permitted startup costs. However, deposit limits and required wording vary by state, locality and type of project.

    Before requesting a deposit:

    • Check applicable contractor and consumer-protection laws
    • Confirm any maximum amount or percentage
    • Identify required contract notices
    • Explain what the deposit covers
    • State when it becomes due
    • Provide the required receipt or documentation
    • Keep accurate records of how the payment is applied

    Do not assume that a commonly used percentage is legal in every location. Some jurisdictions restrict home-improvement deposits or require funds to be handled in a particular manner.

    The deposit should form part of the total contract price. It should not be presented as an unexplained additional charge.

    Align Progress Payments With the Value Delivered

    Each progress payment should reasonably correspond with the value of work completed, materials delivered or costs properly incurred at that stage.

    Avoid schedules that collect most of the contract price before a comparable portion of the project has been completed. Such schedules may be unlawful in some jurisdictions and can make clients uncomfortable.

    Also avoid delaying too much of the price until the end. A large final balance may force the contractor to finance labour and materials throughout the project and increases collection risk.

    Review the cumulative position after every milestone. Compare:

    • Total payments received
    • Value of completed work
    • Cost of materials purchased or delivered
    • Costs already paid
    • Remaining project cost
    • Remaining contract balance

    This comparison helps confirm that the project remains adequately funded without substantially overbilling the client.

    Define When an Invoice Becomes Due

    For every payment stage, state both the billing trigger and the payment deadline.

    For example:

    “An invoice will be issued after completion of rough electrical and plumbing work. Payment is due within five calendar days of the invoice date.”

    The contract should clarify:

    • Who confirms that the milestone is complete
    • How the invoice will be delivered
    • Number of days allowed for payment
    • Accepted payment methods
    • Treatment of weekends and public holidays
    • Applicable late-payment charges, if lawful
    • Contractor’s rights if payment is overdue
    • Required notices before work is suspended

    Keep invoice terms consistent with the estimate and contract. Conflicting deadlines can create uncertainty and weaken collection efforts.

    Do not suspend work automatically without reviewing the contract and applicable law. Notice requirements and suspension rights may vary by jurisdiction.

    Account for Materials and Special Orders

    Major materials and custom products can create significant cash-flow pressure because suppliers may require payment before fabrication, shipment or delivery.

    Identify items such as:

    • Custom cabinets and millwork
    • Windows and doors
    • Fixtures and appliances
    • Structural components
    • Special-order finishes
    • Equipment with long lead times
    • Nonreturnable or specially fabricated products

    Where permitted, connect a client payment to the ordering or delivery of these items. State exactly what the payment covers and whether ownership, storage, insurance or cancellation conditions apply.

    Do not describe a material payment as a completed-work milestone when the materials have not yet been installed. Clear wording helps the client understand why the payment is required at that stage.

    Handle Change Orders Separately

    Changes can increase the project cost and disrupt the original payment schedule. Do not wait until the final invoice to collect every change-order amount.

    Each approved change order should state:

    • Description of the changed work
    • Increase or decrease in price
    • Payment required before ordering additional materials
    • Revised progress-payment amounts
    • Effect on the final balance
    • Effect on the project schedule
    • Required client approval

    Where appropriate and lawful, require payment for approved additional work at the time stated in the change order rather than financing it until project completion.

    Update the project budget and cash-flow forecast whenever a change is approved. The original contract price and payment schedule should not be used to track a project whose scope has materially changed.

    Plan the Final Payment and Retainage

    The final payment should be large enough to encourage proper closeout but not so large that the contractor finances a substantial portion of the completed project.

    Clearly define the conditions for final payment, which may include:

    • Substantial or final completion
    • Completion of agreed corrective items
    • Final inspection or approval
    • Delivery of warranties and operating information
    • Removal of contractor equipment and waste
    • Required lien waivers or releases
    • Client acceptance or handover
    • Final invoice

    If retainage applies, state the percentage, how it is calculated and when it will be released. Retainage requirements and limits may differ by jurisdiction and project type.

    Distinguish genuine incomplete or defective work from minor issues that do not justify withholding the entire final balance. The contract should explain how disputed amounts will be addressed.

    Example of a Milestone Payment Schedule

    The following simplified example shows how a $40,000 contract might be divided. It is for illustration only and must be adjusted for the project’s costs and applicable law.

    • Contract acceptance and permitted deposit: 10% — $4,000
    • Specified major materials ordered or delivered: 20% — $8,000
    • Site preparation and rough work completed: 25% — $10,000
    • Required rough inspections approved: 20% — $8,000
    • Installation and finishing work substantially completed: 20% — $8,000
    • Final closeout requirements completed: 5% — $2,000

    Total: 100% — $40,000

    The percentages should not be copied automatically. A labour-intensive repair project may require a different structure from a project involving expensive custom materials.

    After drafting the schedule, compare every payment with the projected cumulative cost and value delivered at that stage.

    Track Invoices, Payments and Remaining Cash Needs

    A payment schedule is effective only when it is updated throughout the project.

    Maintain a record of:

    • Scheduled payment amount
    • Milestone or billing trigger
    • Invoice number and date
    • Payment due date
    • Amount received
    • Payment date and method
    • Outstanding balance
    • Approved change orders
    • Remaining project costs
    • Forecast final cash position

    Review this information before committing to major purchases or beginning the next stage of work. An unpaid invoice may affect the contractor’s ability to fund the following milestone.

    Compare actual payment timing with the original forecast. This helps identify slow collection, cost overruns and future cash shortages while there is still time to respond.

    Avoid Common Payment-Schedule Mistakes

    Common mistakes include:

    • Using the same percentages for every type of project
    • Requesting a deposit without checking legal limits
    • Linking payments to vague or disputed milestones
    • Collecting too little before major material purchases
    • Leaving an excessive balance until final completion
    • Failing to include invoice deadlines
    • Continuing work despite unresolved overdue payments
    • Adding change-order costs only to the final invoice
    • Forgetting retainage or lien-document requirements
    • Tracking contract value without tracking actual cash received

    Review the schedule from both perspectives. The contractor should receive sufficient payment to support the work, while the client should be able to connect each payment with a clear project event or delivered value.

    When contract requirements are uncertain, obtain advice from a qualified local construction attorney or other appropriate professional.

    Include the Payment Schedule in the Client Estimate

    Show the proposed payment schedule in the client estimate or attach it as a clearly referenced schedule. The payment amounts should total the full quoted price, including applicable taxes and approved allowances.

    For guidance on the other information to include, read How to Prepare a Professional Contractor Estimate for a Client.

    Connect Pricing, Estimating and Payment Tracking

    A payment schedule should be based on the same cost and pricing information used to prepare the project quotation. When these records are disconnected, payment stages may not match the contractor’s actual cash requirements.

    The AZELIVO Contractor Bid-to-Profit Toolkit provides four connected Excel tools:

    • Job Cost Calculator
    • Pricing Calculator
    • Estimate Builder
    • Profit Tracker

    This workflow helps small contractors calculate the internal project cost, select a selling price, prepare a client estimate with milestone payments and compare billing, cash received and actual spending throughout the project.

    Conclusion

    A contractor payment schedule should connect client payments with measurable project milestones and the timing of actual project costs. When payments are planned carefully, the contractor is less likely to finance materials, labour and subcontractors from limited business cash.

    The schedule should clearly state each amount, billing trigger, due date and payment condition. Deposits, progress payments, retainage and collection procedures must also comply with applicable state and local requirements.

    Review the payment schedule whenever the project scope, cost or timeline changes. Consistent invoicing and payment tracking can protect cash flow while giving the client a transparent record of project progress.

  • How to Prepare a Professional Contractor Estimate for a Client

    A professional contractor estimate should help the client understand what work will be completed, what it will cost and how payments will be made. It should also protect the contractor by clearly recording the scope, assumptions, exclusions and commercial terms.

    The client estimate is different from the contractor’s internal job-cost calculation. Internal costs, overhead and profit calculations support the quoted price, but they do not normally need to be disclosed to the client.

    This guide explains what to include in a clear, professional estimate before it is issued for acceptance.

    Identify the Contractor and Client

    Begin with complete identification details so there is no uncertainty about who prepared the estimate and who is expected to accept it.

    Include:

    • Contractor’s legal or trading name
    • Business address and contact details
    • Licence or registration number, where applicable
    • Insurance information, if relevant
    • Client’s full name or company name
    • Client’s billing address and contact details
    • Project name and site address
    • Estimate number and preparation date

    Use a unique estimate number for every quotation. This makes revisions, approvals, invoices and project records easier to track.

    Describe the Scope of Work Clearly

    The scope of work is the most important part of the estimate. It should describe the result the contractor will provide without relying on vague phrases such as “all necessary work.”

    Organise the scope into logical sections or activities and state:

    • The work to be performed
    • Materials, products and finishes to be supplied
    • Quantities, dimensions or quality standards
    • Preparation, installation and cleanup responsibilities
    • Subcontracted work included in the price
    • Permits, inspections or testing included
    • Client-supplied materials or services
    • Deliverables provided at completion

    Use language that the client can understand while remaining specific enough to prevent different interpretations. Attach drawings, specifications or schedules when they form part of the agreed scope.

    State the Price and Applicable Taxes

    Present the quoted amount clearly and specify whether it is a fixed price, an allowance-based estimate or another pricing arrangement.

    Show:

    • Subtotal before tax
    • Applicable sales tax or other required taxes
    • Total estimated or contract price
    • Currency
    • Allowances or provisional amounts
    • Optional work priced separately

    Avoid displaying the contractor’s internal material cost, labour cost, overhead calculation or profit margin unless there is a specific commercial reason to do so.

    If the price is based on assumptions or allowances, explain how any difference between the allowance and actual cost will be handled.

    Include a Payment Schedule

    The payment schedule should support project cash flow and correspond with the value of work, materials or milestones completed.

    Depending on the project and applicable law, the schedule may include:

    • Initial deposit
    • Payment before ordering major materials
    • Mobilisation payment
    • Progress payments linked to defined milestones
    • Periodic payments based on completed work
    • Payment following substantial completion
    • Final payment after agreed closeout requirements

    For every payment, state the amount or percentage, the event that makes it due and the permitted payment methods.

    Avoid vague descriptions such as “payment during work.” Use measurable milestones so both parties can determine when payment is required.

    Provide the Expected Schedule

    State the anticipated start date, estimated duration or important project milestones when this information is reasonably available.

    Clarify that the schedule may depend on:

    • Client approval and deposit payment
    • Permit or inspection timing
    • Material and equipment availability
    • Site access
    • Completion of preceding work
    • Weather conditions
    • Approved changes
    • Events beyond the contractor’s reasonable control

    Do not promise a completion date that the business cannot realistically support. When dates are estimates rather than guarantees, say so clearly and explain how schedule changes will be communicated.

    List Assumptions and Exclusions

    Assumptions explain the conditions on which the price is based. Exclusions identify work or costs that are not included.

    Examples may include:

    • Existing conditions assumed to be suitable
    • Unforeseen concealed damage
    • Hazardous-material testing or removal
    • Utility relocation
    • Structural or engineering changes
    • Work by other contractors
    • Client-supplied products
    • After-hours or accelerated work
    • Permit fees not included
    • Repairs outside the described work area
    • Additional work requested after acceptance

    Avoid broad exclusions that contradict the promised scope. Each assumption or exclusion should relate to a genuine pricing or project risk.

    Clear exclusions reduce disputes and help the client compare estimates from different contractors on a consistent basis.

    Explain How Changes Will Be Approved

    State that work outside the accepted scope requires a written change order or other documented approval before it proceeds.

    A change order should record:

    • Description of the changed or additional work
    • Increase or decrease in price
    • Effect on the payment schedule
    • Effect on the project timeline
    • Revised materials, quantities or specifications
    • Approval by the authorised client and contractor representatives

    Emergency work may require a different process, but it should still be documented as soon as reasonably possible.

    A clear change-order procedure protects both parties and prevents informal requests from becoming disputed unpaid work.

    Set an Estimate Expiration Date

    Supplier prices, labour availability and project schedules can change. State how long the estimate remains valid.

    For example:

    “This estimate is valid for 30 days from the date of issue. After that date, pricing and availability may be reviewed before acceptance.”

    Choose a validity period appropriate to the project and market conditions. If a supplier quotation expires sooner, ensure the client estimate does not remain valid beyond the price on which it depends.

    An expiration date does not automatically resolve every price-change risk. Significant volatility may require a specific adjustment clause reviewed for compliance with applicable law.

    Provide a Clear Acceptance Section

    Provide a space for the client to confirm acceptance of the scope, price, payment schedule and referenced terms.

    The acceptance section may include:

    • Client’s printed name
    • Signature
    • Date
    • Accepted estimate number and revision
    • Authorised company representative
    • Selected optional items
    • Required deposit or payment confirmation

    Keep a copy of the accepted estimate and all attachments. Do not begin work until the required approval and initial payment have been received.

    Depending on local law and the wording used, an accepted estimate may form part of a binding contract. Contractors should ensure their estimate and contract documents comply with applicable licensing and consumer-protection requirements.

    Review the Estimate Before Sending It

    Complete a final review before issuing the estimate.

    Confirm that:

    • Client and project details are correct
    • The scope matches the latest drawings and discussions
    • The price matches the approved internal calculation
    • Taxes and allowances are shown correctly
    • Payment milestones total the full price
    • Assumptions and exclusions are clear
    • Optional items are identified separately
    • Schedule information is realistic
    • Change-order and acceptance procedures are included
    • Referenced attachments are enclosed
    • Spelling, arithmetic and formatting have been checked

    Save the issued version and avoid overwriting it. If the estimate changes, create a clearly numbered revision and record what was amended.

    Keep the Internal Cost Calculation Separate

    The client estimate should be supported by a separate internal calculation showing materials, labour, subcontractors, equipment, permits, contingency, overhead and expected profit.

    The internal job-cost estimate helps the contractor:

    • Confirm that the quoted price is financially viable
    • Identify the assumptions behind the price
    • Establish the project budget
    • Track actual spending
    • Forecast final profit
    • Improve future estimates

    Do not rely on the client-facing document as the only project budget. It may show a combined selling price without the detail required for cost control.

    For a detailed costing checklist, read Contractor Job Cost Estimate: What to Include Before Pricing a Project.

    Use a Connected Estimate and Profit-Tracking Workflow


    A professional estimate is more reliable when it is connected to the original job-cost calculation and the project’s actual financial performance.

    The AZELIVO Contractor Bid-to-Profit Toolkit provides four connected Excel tools:

    • Job Cost Calculator
    • Pricing Calculator
    • Estimate Builder
    • Profit Tracker

    This workflow helps small contractors move from internal cost to selling price, prepare a client estimate with a payment schedule and monitor the forecast final profit throughout the project.

    Conclusion

    A professional contractor estimate should make the scope, price, payment schedule, assumptions and acceptance process easy to understand. Clear information helps the client make an informed decision and gives the contractor a reliable record of what was offered.

    The client-facing estimate should always be supported by a complete internal job-cost and pricing calculation. Keeping these records connected reduces errors and makes it easier to track the project’s financial performance.

    Before issuing the estimate, check every amount, attachment and commercial term. A careful review can prevent misunderstandings, protect cash flow and support a more professional client experience.

  • Contractor Job Cost Estimate: What to Include Before Pricing a Project

    A reliable selling price begins with a complete job-cost estimate. If materials, labour, subcontractors or other project expenses are omitted or understated, the quotation may appear profitable while producing little or no actual profit.

    A job-cost estimate is an internal calculation of the resources required to complete the agreed scope of work. It should be prepared before markup, profit margin and the final client price are calculated.

    This guide explains the principal costs contractors should include, how to organise the estimate and how to reduce the risk of expensive omissions.

    Start With a Clearly Defined Scope of Work

    The estimate should be based on a written description of exactly what the contractor is expected to provide. Review drawings, specifications, measurements, site conditions and client requirements before calculating costs.

    A clear scope should identify:

    • The work included in the quotation
    • Quantities, dimensions and required quality standards
    • Materials, finishes and equipment to be supplied
    • Work to be completed by subcontractors
    • Permits, inspections and approvals required
    • Access restrictions and working-hour limitations
    • Client-supplied items or services
    • Assumptions, exclusions and known uncertainties

    When the scope is unclear, record the assumption used in the estimate and clarify it in the client quotation. This reduces the risk of completing additional work without payment.

    Estimate Material Costs

    Prepare a quantity-based list of the materials required for the project. Use current supplier prices whenever possible and confirm whether quotations include taxes, delivery and other charges.

    Material costs may include:

    • Primary construction or installation materials
    • Fasteners, adhesives and consumable supplies
    • Delivery, freight and handling charges
    • Storage and protection materials
    • Waste removal and disposal fees
    • Expected waste, cutting loss or breakage
    • Price increases expected before purchase
    • Small items that are easily overlooked

    Apply a reasonable waste allowance according to the material and type of work. Keep supplier quotations and record the date on which each price was obtained, because older prices may no longer be reliable.

    Calculate Direct Labour Cost

    Estimate the productive hours required for each activity and multiply those hours by the contractor’s true labour cost—not merely the employee’s basic hourly wage.

    Direct Labour Cost = Estimated Labour Hours × Fully Burdened Labour Rate

    The fully burdened labour rate may include:

    • Basic wages
    • Employer payroll taxes
    • Workers’ compensation insurance
    • Employee benefits
    • Paid leave and holiday costs
    • Other employment-related expenses

    Also include project-specific supervision, mobilisation, site preparation, cleanup and travel time when these activities are required to complete the work.

    Review previous projects to compare estimated hours with actual hours. Historical productivity records often provide a more reliable basis than an unsupported guess.

    Include Subcontractor Costs

    Obtain written quotations from subcontractors whenever possible. Confirm that each quotation is based on the same drawings, specifications and scope used in the main estimate.

    Check whether the subcontractor’s price includes:

    • Labour and materials
    • Equipment and mobilisation
    • Delivery and disposal
    • Permits or inspections
    • Taxes and insurance
    • Testing, commissioning or certification
    • Cleanup and correction of defective work
    • Travel or accommodation
    • The expected project schedule

    Identify work that falls between different subcontractor scopes. These gaps often become unexpected costs for the main contractor.

    If a firm quotation is unavailable, use a documented allowance and clearly record the basis of the estimate.

    Add Equipment and Tool Costs

    Include the cost of equipment and tools required specifically for the project, whether they are rented or owned.

    Project equipment costs may include:

    • Rental charges
    • Delivery, pickup and mobilisation
    • Fuel, electricity and other operating costs
    • Operator charges
    • Insurance or damage waivers
    • Maintenance and consumable parts
    • Temporary access equipment
    • Small tools purchased specifically for the job

    For owned equipment, use a reasonable internal rate that reflects depreciation, maintenance, repairs and operating costs. General tools used across many projects may instead be recovered through business overhead.

    Include Permits, Site Expenses and Other Direct Costs

    Identify all additional expenses that arise because the project is being performed. These costs may be small individually but significant when combined.

    Depending on the work, include:

    • Permit and inspection fees
    • Testing, surveys and professional services
    • Temporary utilities and site facilities
    • Safety equipment and project-specific protection
    • Security, fencing and signage
    • Waste containers and disposal charges
    • Transportation, parking, tolls and travel
    • Accommodation or subsistence
    • Cleaning and final handover expenses
    • Bonds, project-specific insurance or warranties

    Review the project from mobilisation through final completion. Costs incurred before physical work begins or after installation finishes are still part of the job.

    Add a Contingency Allowance

    Contingency is an allowance for identifiable uncertainty within the agreed project scope. It is not a substitute for careful estimating and should not be confused with profit.

    The appropriate allowance depends on factors such as:

    • Completeness of drawings and specifications
    • Reliability of quantities and supplier prices
    • Existing conditions that cannot be fully inspected
    • Complexity of the work
    • Schedule and weather risks
    • Availability of labour and materials
    • Possibility of minor rework or productivity loss

    A project with clear information and limited uncertainty may require a smaller contingency than renovation or repair work involving concealed conditions.

    Client-requested additions and changes to the agreed scope should normally be handled through approved change orders rather than absorbed by the contingency allowance.

    Calculate the Total Estimated Job Cost

    Combine all estimated direct costs and the contingency allowance in one internal job-cost summary.

    For example:

    • Materials: $15,000
    • Direct labour: $8,000
    • Subcontractors: $5,000
    • Equipment and tools: $2,000
    • Permits and other direct costs: $1,000
    • Contingency allowance: $2,000

    Total Estimated Job Cost = $33,000

    Check that every amount relates to the agreed scope and that no cost has been counted twice. Keep supporting calculations, supplier quotations and assumptions with the estimate so they can be reviewed later.

    Add Overhead Before Calculating Profit

    The job-cost estimate covers project-specific expenses, but the selling price must also recover an appropriate share of the business’s general operating expenses.

    Add the calculated overhead allowance to the total estimated job cost:

    Cost Base for Pricing = Total Estimated Job Cost + Overhead Allowance

    If the total estimated job cost is $33,000 and the project overhead allowance is $6,000:

    Cost Base for Pricing = $33,000 + $6,000

    Cost Base for Pricing = $39,000

    Profit or target margin should be calculated only after both the job costs and overhead allowance have been included.

    For more detail, read How to Calculate Overhead Recovery for a Contracting Business.

    Review the Estimate Before Pricing

    Before calculating the selling price, review the estimate systematically.

    Confirm that:

    • The estimate matches the current scope, drawings and specifications
    • Quantities and measurements have been checked
    • Supplier and subcontractor prices are current
    • Labour hours reflect realistic productivity
    • Delivery, waste and disposal costs are included
    • Equipment, permits and site expenses are covered
    • Taxes and employment-related costs are treated correctly
    • Known risks have an appropriate contingency allowance
    • Overhead has been added separately
    • Assumptions and exclusions are clearly recorded
    • No cost has been omitted or counted twice

    For larger or higher-risk projects, a second person should independently review the estimate before the quotation is issued.

    Track Estimated Costs Against Actual Costs

    The value of an estimate continues after the quotation has been accepted. Use it as the project budget and compare estimated amounts with actual commitments and costs.

    Track:

    • Purchase orders and material invoices
    • Actual labour hours and labour cost
    • Subcontractor commitments and payments
    • Equipment and site expenses
    • Approved client changes
    • Remaining cost to complete
    • Forecast final cost and profit

    Review significant differences after each project. If labour hours, waste, supplier prices or other costs were consistently underestimated, update the estimating basis used for future quotations.

    This feedback process helps the business improve accuracy instead of repeating the same estimating errors.

    Use a Connected Estimating and Pricing Workflow

    A complete job-cost estimate should flow directly into pricing, the client estimate and project cost tracking.

    The AZELIVO Contractor Bid-to-Profit Toolkit provides four connected Excel tools:

    • Job Cost Calculator
    • Pricing Calculator
    • Estimate Builder
    • Profit Tracker

    The workflow helps small contractors prepare an internal cost estimate, include overhead, calculate a selling price, create a client estimate and monitor the forecast final profit without repeatedly rebuilding the same information.

    Conclusion

    A dependable quotation begins with a complete and well-supported job-cost estimate. Define the scope clearly, calculate materials and labour carefully, obtain reliable subcontractor prices and include equipment, permits, site expenses and contingency.

    After the direct job costs are established, add the appropriate overhead allowance before calculating markup, profit margin and the final selling price.

    Finally, compare estimated costs with actual project results. Regular review will improve future estimates, protect profit and help the business make more confident pricing decisions.


  • How to Calculate Overhead Recovery for a Contracting Business

    A contracting business must recover more than the direct cost of materials, labour and subcontractors. It must also recover the ongoing expenses required to operate the business, such as insurance, office costs, vehicles, software, accounting and administrative salaries.

    These expenses are commonly called business overhead. If overhead is not properly included in project pricing, a job may appear profitable while the business as a whole loses money.

    This guide explains how contractors can calculate their overhead, select a practical recovery method and include the correct allowance in every quotation.

    What Is Business Overhead?

    Business overhead consists of expenses that support the company but cannot be assigned entirely to one specific project.

    Common overhead expenses may include:

    • Office rent and utilities
    • Business insurance
    • Administrative and management salaries
    • Accounting, legal and professional fees
    • Software subscriptions and communication costs
    • Marketing and advertising
    • Vehicle expenses not charged directly to a project
    • Licences, registrations and memberships
    • Office equipment and supplies
    • Depreciation of business assets
    • Training and general safety expenses
    • Interest and bank charges

    Direct project costs should be recorded separately. For example, materials purchased for a particular job, project labour, subcontractors, equipment hire and permit fees normally belong in the job-cost estimate rather than general overhead.

    Calculate Your Annual Overhead

    Start by reviewing the business’s expenses for the previous 12 months. Remove direct project costs and personal expenses, then group the remaining operating expenses into clear overhead categories.

    For example:

    • Office and utilities: $18,000
    • Insurance: $12,000
    • Administrative salaries: $48,000
    • Vehicles and fuel: $15,000
    • Software and communications: $6,000
    • Accounting and professional fees: $5,000
    • Marketing and other expenses: $16,000

    Total Annual Overhead = $120,000

    Use realistic figures from accounting records whenever possible. If the business is new, prepare a carefully researched annual budget and review it regularly as actual expenses become available.

    Choose an Overhead Recovery Method

    There is no single recovery method suitable for every contracting business. The appropriate method depends on the type of work, the reliability of available data and the way projects use company resources.

    Common methods include:

    • Recovering overhead as a percentage of direct job costs
    • Applying an overhead amount to each productive labour hour
    • Allocating a fixed amount to each project
    • Using different recovery rates for different types of work

    The selected method should distribute the expected annual overhead fairly across the projects the business expects to complete.

    Method 1: Percentage of Direct Job Costs

    Overhead Recovery Rate = Annual Overhead ÷ Annual Direct Job Costs

    If annual overhead is $120,000 and expected annual direct job costs are $600,000:

    Overhead Recovery Rate = $120,000 ÷ $600,000

    Overhead Recovery Rate = 20%

    For a project with estimated direct costs of $30,000:

    Project Overhead Allowance = $30,000 × 20%

    Project Overhead Allowance = $6,000

    The total cost base before profit would therefore be $36,000.

    This method is simple to apply, but it may allocate too much overhead to material-intensive projects and too little to projects that require substantial management or labour.

    Method 2: Overhead per Productive Labour Hour

    Overhead Rate per Hour = Annual Overhead ÷ Annual Productive Labour Hours

    If annual overhead is $120,000 and the business expects 6,000 productive labour hours:

    Overhead Rate per Hour = $120,000 ÷ 6,000

    Overhead Rate per Hour = $20

    If a project requires 300 productive labour hours:

    Project Overhead Allowance = 300 × $20

    Project Overhead Allowance = $6,000

    Productive hours should be estimated carefully. Holidays, training, administration, downtime and other non-project hours should not be treated as productive project hours unless the business has a clear reason for doing so.

    Method 3: Fixed Overhead Amount per Project

    A business that completes projects of similar size and duration may divide its annual overhead by the expected number of projects.

    Overhead per Project = Annual Overhead ÷ Expected Number of Projects

    If annual overhead is $120,000 and the business expects to complete 40 projects:

    Overhead per Project = $120,000 ÷ 40

    Overhead per Project = $3,000

    Each project would include a $3,000 overhead allowance before profit is added.

    This method is easy to use, but it may be unsuitable when projects vary significantly in value, duration, labour requirements or management effort.

    Add Profit After Recovering Overhead

    Overhead recovery is not the same as profit. Overhead pays the general expenses of operating the business, while profit is the amount remaining after direct costs and overhead have been recovered.

    For example:

    • Direct job costs: $30,000
    • Overhead allowance: $6,000
    • Total cost base: $36,000
    • Target profit margin: 20%

    Selling Price = $36,000 ÷ (1 − 0.20)

    Selling Price = $36,000 ÷ 0.80

    Selling Price = $45,000

    The expected profit is $9,000, which equals 20% of the selling price.

    For the complete pricing formula, read How to Calculate a Selling Price From a Target Profit Margin.

    Review Overhead Recovery Regularly

    An overhead rate should not be calculated once and used indefinitely. Business expenses, staffing levels, productive hours and annual workload can change.

    Compare the following figures every month or quarter:

    • Actual overhead incurred
    • Overhead included in completed and active projects
    • Expected annual project volume
    • Actual productive labour hours
    • Forecast overhead under-recovery or over-recovery

    If the business is recovering less overhead than planned, future quotations may need a higher recovery rate. If recovery is consistently higher than required, review whether the cost forecast, workload assumption or allocation method should be adjusted.

    The purpose is not to recover exactly the same amount every month. The goal is to recover the full annual overhead across the year’s projects.

    Common Overhead Recovery Mistakes

    Avoid these common mistakes:

    • Treating overhead recovery as profit
    • Using total employee hours instead of realistic productive hours
    • Excluding owner or management compensation from business costs
    • Counting the same expense as both a direct cost and overhead
    • Using an outdated annual overhead estimate
    • Assuming every project consumes overhead in the same way
    • Applying a percentage without checking whether it recovers the annual requirement
    • Reducing the overhead allowance merely to make a quotation appear competitive
    • Failing to compare recovered overhead with actual overhead

    A low quotation does not reduce the business’s real operating expenses. It only increases the risk that those expenses will remain unrecovered.

    Use a Connected Job-Costing and Pricing Workflow

    The AZELIVO Contractor Bid-to-Profit Toolkit helps small contractors:

    • Build a detailed internal job-cost estimate
    • Include an overhead recovery allowance
    • Compare markup and target-margin pricing
    • Prepare a client estimate and payment schedule
    • Track budgeted and actual project costs
    • Forecast final profit and gross margin

    Using one connected workflow helps ensure that overhead is included consistently from the initial estimate through project completion.

    Conclusion

    Recovering overhead is essential for sustainable contractor pricing. Begin with a realistic annual overhead estimate, select a recovery method that reflects how the business operates and include the calculated allowance in every relevant project.

    Overhead must be recovered before profit is measured. A project price that covers direct job costs but ignores business overhead can create the appearance of profit while weakening the company’s overall financial position.

    Review actual overhead and recovery throughout the year. Consistent job costing, overhead allocation and profit tracking will help the business prepare more reliable quotations and make better pricing decisions.

  • How to Calculate a Selling Price From a Target Profit Margin

    Pricing a job from a target profit margin is different from simply adding a markup to cost. A contractor who confuses the two may quote a price that looks profitable but produces a much smaller margin than intended.

    The correct calculation starts with the total estimated job cost and works backward from the profit margin the business wants to earn. This guide explains the formula, shows practical examples and identifies the costs that should be included before calculating the selling price.

    The Selling Price Formula

    Selling Price = Total Estimated Cost ÷ (1 − Target Profit Margin)

    Write the target margin as a decimal. For example, use 0.20 for a 20% margin and 0.30 for a 30% margin.

    If a job is expected to cost $10,000 and the contractor wants a 20% profit margin:

    Selling Price = $10,000 ÷ (1 − 0.20)

    Selling Price = $10,000 ÷ 0.80

    Selling Price = $12,500

    At a selling price of $12,500, the expected gross profit is $2,500. That profit is 20% of the selling price.

    Why Adding 20% to Cost Is Not the Same

    For a detailed comparison, read our guide: Markup vs. Margin: Why a 20% Markup Does Not Give You a 20% Profit Margin.

    If a contractor adds a 20% markup to a $10,000 cost, the quoted price is only $12,000.

    The resulting profit is $2,000, but the profit margin is:

    $2,000 ÷ $12,000 = 16.67%

    Therefore, a 20% markup produces a 16.67% margin—not a 20% margin. To achieve a true 20% profit margin, the selling price must be $12,500.

    What to Include in Total Estimated Cost

    The selling-price calculation is only reliable when the underlying job-cost estimate is complete. Depending on the project, total estimated cost may include:

    • Materials, delivery charges and waste allowances
    • Direct labour, payroll taxes and employment-related costs
    • Subcontractor quotations
    • Equipment hire, tools and temporary facilities
    • Permits, inspections and project-specific fees
    • Travel, transport and site expenses
    • A reasonable contingency for identified project risks

    Missing or understated costs will make the expected profit appear higher than it is likely to be.

    Account for Business Overhead

    Job costs alone do not represent the full cost of operating a contracting business. Rent, insurance, office salaries, software, vehicles, marketing, accounting and other general expenses must also be recovered through project revenue.

    A contractor may allocate overhead to each job as a percentage, a fixed amount or an hourly recovery rate. Whatever method is used, the overhead allowance should be included before applying the target-margin formula.

    Profit should remain after both project costs and the job’s appropriate share of business overhead have been recovered.

    Worked Example With Overhead

    Assume that a contractor estimates the following amounts:

    • Direct job costs: $18,000
    • Allocated business overhead: $2,000
    • Total estimated cost: $20,000
    • Target profit margin: 25%

    The required selling price is:

    Selling Price = $20,000 ÷ (1 − 0.25)

    Selling Price = $20,000 ÷ 0.75

    Selling Price = $26,666.67

    The expected profit is $6,666.67, which equals 25% of the selling price.

    Why the Actual Margin May Differ

    The calculated margin is a planning target, not a guarantee. The actual profit margin may be lower if:

    • Material prices increase after the quotation is prepared
    • Labour takes longer than estimated
    • Rework or unexpected site conditions create additional costs
    • Subcontractor charges exceed the original allowance
    • Project delays increase supervision or equipment costs
    • Extra work is completed without an approved change order
    • The client delays or fails to make a payment

    Contractors should monitor estimated costs against actual costs throughout the project and update the profit forecast whenever conditions change.

    A Practical Pricing Process

    Before submitting a fixed-price quotation, follow this process:

    1. Define the complete scope of work.
    2. Estimate materials, labour, subcontractors, equipment and other direct costs.
    3. Add contingency for identifiable project risks.
    4. Include the job’s appropriate share of business overhead.
    5. Select a realistic target profit margin.
    6. Calculate the required selling price using the target-margin formula.
    7. Compare the calculated price with market conditions and the value provided.
    8. Confirm all assumptions, exclusions and payment terms in the client estimate.
    9. Track actual costs and approved changes throughout the project.
    10. Review the forecast final profit before the project is completed.

    Use a Connected Pricing Workflow

    Accurate pricing becomes easier when job costing, overhead recovery, margin calculation, client estimates and profit tracking are connected.


    The AZELIVO Contractor Bid-to-Profit Toolkit provides four connected Excel tools to help small contractors move from estimated cost to selling price, prepare a professional client estimate and monitor the project’s forecast final profit.

    The toolkit includes:

    • Job Cost Calculator
    • Pricing Calculator
    • Estimate Builder
    • Profit Tracker

    Using one connected workflow reduces repeated data entry and helps ensure that the selling price is based on complete, consistent cost information.

    Conclusion

    To calculate a selling price from a target profit margin, first establish the complete estimated cost of the job, including direct costs, contingency and overhead. Then divide that amount by one minus the target margin.

    This approach provides a clearer pricing target than applying a simple markup. However, the expected margin will only be achieved if the cost estimate is realistic and actual project costs are properly controlled.

    Consistent estimating, disciplined pricing and regular profit tracking help contractors quote with greater confidence and protect the financial health of their business.

  • Markup vs. Margin: Why a 20% Markup Does Not Give You a 20% Profit Margin

    Markup vs. Margin: Why a 20% Markup Does Not Give You a 20% Profit Margin

    A contractor can price a job above its estimated cost and still earn less margin than expected. One common reason is treating markup and margin as if they mean the same thing.

    A Simple Example

    Suppose a job’s estimated cost is $1,000. You add a 20% markup:

    Cost: $1,000

    Markup: $200

    Selling price: $1,200

    The expected profit is $200. However, profit margin is measured against the selling price—not the cost.

    $200 ÷ $1,200 × 100 = 16.67% margin

    Therefore, a 20% markup produces a 16.67% profit margin in this example.

    What Selling Price Gives You a 20% Margin?

    If the estimated cost is $1,000 and your target profit margin is 20%, calculate the selling price using this formula:

    Selling price = Cost ÷ (1 − Target margin)

    $1,000 ÷ (1 − 0.20) = $1,250

    At a $1,250 selling price, the expected profit is $250. This equals 20% of the selling price and is equivalent to a 25% markup on the $1,000 cost.

    Pricing methodSelling priceExpected profitResult
    20% markup$1,200$20016.67% margin
    20% target margin$1,250$25025% markup

    Check What You Included in the Cost

    The calculation is only as reliable as the cost estimate behind it. Before setting your selling price, include all expected project costs, such as materials, labour, subcontractors, equipment, permits and contingency. You should also consider how the project will recover its share of business overhead.

    After work begins, compare the budget with actual spending. A price calculated before the project starts cannot guarantee the final profit if quantities, rates, scope or project conditions change.

    Build the Calculation into Your Estimating Workflow

    Markup and margin should not be treated as isolated percentages. They form part of a wider process that begins with estimating the job cost and continues through pricing, client presentation, cost tracking and final profit forecasting.

    The AZELIVO Contractor Bid-to-Profit Toolkit helps small contractors connect job costing, overhead recovery, pricing, client estimates, actual spending and profit forecasting in one practical Excel-based workflow.